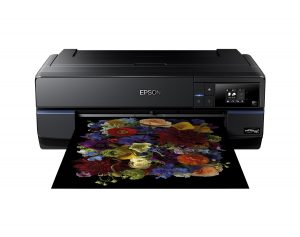
Monochrome photo printing – not simply black and white.
Producing professional quality monochrome photos is not as straightforward as you might expect. Whilst most desktop photo printers will quite easily replicate a decent colour image, they can fall short when it comes to the reproduction of black and white photos.
Why is this the case?
A standard photo printer will usually contain four inks – cyan, magenta and yellow (CMY) for creating colour aspects of a print and a solitary black ink for creating all the grey and black shades. Those devices that have two black inks as standard generally have one for use with matte papers and a second one used for gloss papers – these are not used in conjunction with one another on a single print.
So, why is this a problem?
The key to a good monochrome photograph is in the tonal gradations of shading, if using just one ink to create all the shades of grey there are some inherent problems. The amount of grey your eyes perceive is determined by the balance between black dots and white space on the printed page. This means that to create certain shades, you need to increase the amount of white space on the page, which can lead to the image looking grainy.
The alternative is to print an image using composite black which is made up of black ink as well as the CMY inks used together. This allows the machine to create more shades and maintain a good resolution of print. The downside to this process though is that it can make your black and white prints appear to have a magenta or green hue to them – which is a common problem on four colour models when printing greys.
What’s the solution?
There are a variety of ways to adjust the settings to improve colour cast on your black and white images that include trying different colour profiles, using a software RIP or even amending the original print in your photo editing software. Ultimately though, the best way to produce good quality black and white prints is to invest in a device with multiple black and grey inks.
By having a variety of grey shades in the device, you can produce a diverse range of shades without compromising on resolution. With much smaller differences in tone between grey and light grey inks for example, than between standard black and the white on the page, the transition in tones is much smoother making for a more realistic black and white image.
The added advantage of multiple grey and black shades is that you rely much less on the colours in your device to help create shades, meaning that magenta or green hues are also much less common.
For the best black and white photo reproduction, we would recommend the Canon Pro 1, Pro 1000 or Epson SC-P800 models that all make use of at least three grey/black shades to bring out the best in your black and white photos.


1 comment
I have an Epson Stylus Photo 1500W printer. Is it possible to make it do good black and white photos without a colour cast?
If I buy one of the printers you recommend do they also print good colour as well.
Andy Gammon Freelance designer