Sometimes when experiencing issues printing, it can be a result of a print driver or an issue caused as a result of a system update. Plus, should you get a new printer then the existing drivers from your previous model may still exist on your PC and cause communication conflict and perhaps slow down performance. To solve this problem, we thought we’d take a look at how to delete printer drivers in Windows 7.
The first thing to do would be to simply remove a device from the devices and printers section in the control panel menu found in Windows. This will remove the machine, but may not completely remove all the associated drivers from the PC itself, which is when issues can arise.
Uninstall Old Printer Software
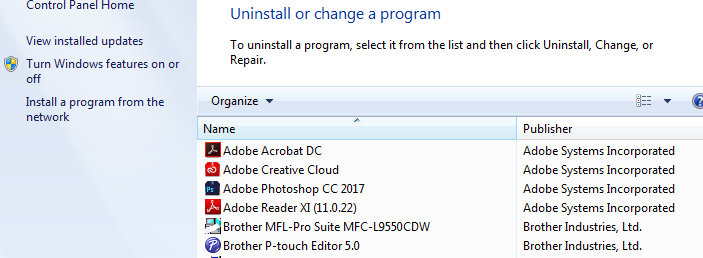
Firstly, you want to completely uninstall the old printer software, this can include scan software for MFPs or other programs bundled with the installation disc supplied with your machine. This can be found in Programs and Features in control panel. Then select the printer driver and click on it and press uninstall. Once complete, restart your computer.

Note – If you have a multifunction device then you may need to remove any other additional software associated with this. Software usually appears in the uninstall/change menu separately too.
Remove Remaining Incorrect or Damaged Drivers
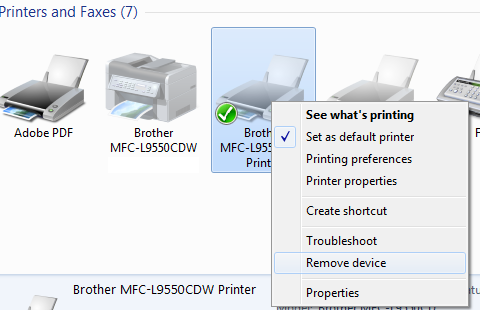
Head back to the control panel and go to Devices and Printers and if the old printer is still there, remove the device by right clicking on it and pressing remove device.

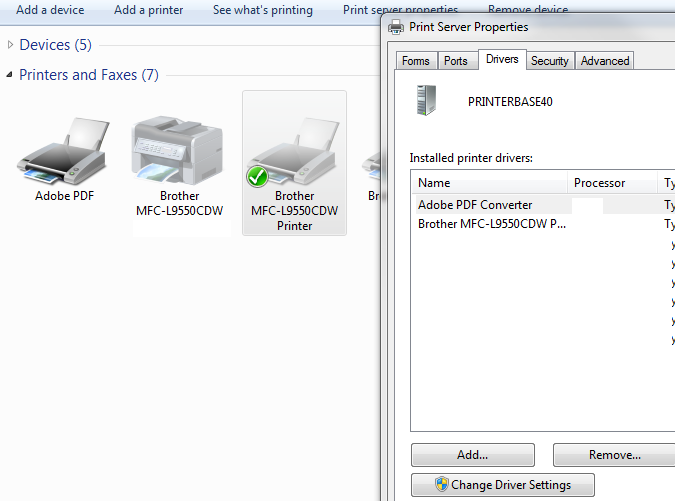
Once you’ve done this, select (highlight) another printer and select the Print Server Properties tab at the top, followed by the drivers tab.
Then you can find the printer driver you need to delete from your PC and select remove

Then restart your computer again.
That’s it! Your unwanted or damaged printer driver will now be removed, and you should be free to print as you need to.
Happy Printing!

