There are several ways to scan from a multifunction (MFP) or printer to a computer. The process may differ slightly across devices and brands, but the general steps are similar. So let’s take a look how to scan from a printer to a computer.
How to Scan to a Computer Using USB
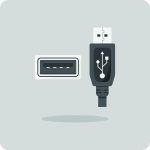
Usually the easiest method to implement is via USB cable connection as most, if not all, multifunction printers can be used with this connection. To scan via USB, you need to ensure the machine is connected directly to the computer and that the manufacturer drivers have been installed. In a lot of cases, the manufacturer will include some scan software with the installation CD so make sure this is also installed. Most drivers and software can be found and downloaded straight form the manufacturer website.
In cases where the device is not supplied with scanning software, you may need to use a generic application for scanning such as the Scan app on Windows 10 or equivalent for older PCs or Mac’s.
There are two ways to scan using USB; Push scan and Pull scan.

Push scan is where you set the documents on the printer itself and then use the scan-to function to send the job to the computer from the MFP. It is usually a simple process of selecting scan on the control panel and choosing the scan via USB or scan to PC function. When using this method, the software on the PC would open automatically when it receives the information and then you can edit and save the scan on the computer.
Pull scanning is similar; you would load the papers on the printer but instead of using the control panel, you would instead open the scan software on the computer and initiate the scan from within the software.
How to Scan to a Network (wired or Wi-Fi)
This process takes more configuration than scanning via USB but is much more common in office environments where multiple users may need to scan. It is possible on some models to scan directly to the software on an individual computer over the network, but more common would be to configure the device so that it either scans to a shared folder on the network or sends the scan straight to a folder on the individual computer.
To set up scanning over the network does require a degree of computing knowledge as you will need to both create a location for the scans and then provide the location and user credentials to the printer for this folder. This can be done from the panel on the device but is most often easier via the web interface of the printer (using its IP address). If you have onsite IT support, this is a straightforward setup usually and once configured, scanning is as simple as selecting the correct location from the list of destinations in the scan menu.
How to Scan to Email
Much like scanning via network, this requires some setup. To use scan to email you need to configure the mail settings on the printer by providing it with a mail server through which to send the emails. This is usually setup using the business email servers or can be done using a generic one such as Gmail. Again, this is something that can be configured in the web interface and would usually be done by an IT administrator. Once configured, you can simply scan to any email address from the device address book, or by inputting it manually.
Instructions for setting up the scan-to functions on your particular device will be found in the manufacturers user guide for your particular model of machine, or you can call the manufacturer directly for setup help.
We hope this helped! Feel free to ask any questions in the comments below.

