Whether you’re a home-user, semi-pro or professional photographer, there are many things to consider when printing photos but it’s not as daunting as it may sound and we’re here to help! If you’re looking to print general photos in their simplest form, then you can near enough pick up any inkjet printer and you’ll be able to do the trick. Of course, as your needs and requirements change there are some different things to consider and we’ll be exploring the possibilities and the best printers for printing photographs.
Printers for Home Users Printing Photos
The first thing to take into account is the type of photos you’re looking to print. Most photos are stored digitally these days so it’s safe to assume that if you’re a home user you’re likely looking to print directly from your iPhone or digital camera. These devices will normally just save the photos in a JPEG, which is a universally recognised file format and perfect for printing your pics!
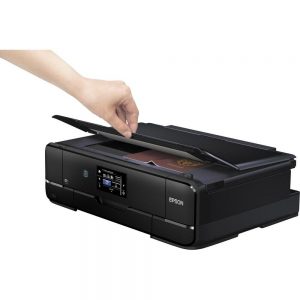
One of the most important factors you’ll be looking at is the quality of the picture so you need to make sure that the resolution is suitable for the size of print you want. If your image has a low resolution, then look at printing smaller sizes like 4 x 6 inches. If you try and print low resolution images in large sizes, then your photos will inevitably look stretched and pixelated. However, if your photo has a high resolution then you have much more freedom on the size you want to print, a larger printer like the Expression Photo XP-960 would work well.
If you do want to print photos that have been taken on film cameras, then you’d need to scan the negatives first, a topic we previously touched on.
But What Printer Do I Need!?
Firstly, you need to ask yourself what you need the printer for. A dedicated photo printer? Or a printer that can perform multiple tasks for other work as well?
If it’s only photos you’re printing, then a dedicated single function machine like the Canon SELPHY CP 1200 would be perfect and is available at an extremely reasonable price. Just remember you’re limited to print sizes of up to 4 x 6 inches though.
If you’re looking for a printer that you can print a variety of A4 and A3 documents as well as photos, then an inkjet printer is what you should be looking at. The Canon PIXMA iP7250 or the iX6850 would both work well.
If you need to go all out and want a high-quality printer that can do absolutely anything including print, copy and scan, print standard text based documents, as well as the ability to print great looking photos on a wide variety of media then look no further than the Epson Expression Premium XP-630. A fantastic printer and extremely well priced!
But it Doesn’t Matter What Type of Ink I Use… Right?
Wrong! There are two types of ink you can use but both have different effects making it an important matter. Dye based ink is good for colour and providing bright and vivid prints but the finer detail isn’t quite there and can actually end up running on the paper. But you may find this a benefit rather than a hindrance depending on the effect you want on your prints.
Pigment ink on the other hand removes the running and bleeding effect and really shows up the finer details and colours. Most are also water resistant, don’t react to light as badly and are likely to last much longer before they begin to fade.
Some printers will offer a combination of both pigment black and dye-based colour inks to get the benefits of both, but pigment colours are becoming more and more popular.
We’d also advise using a CMYK cartridge setup rather than a tricolour cartridge if possible. If one colour runs out in your tricolour cartridge then you’ll be required to replace all of the colours, whereas the CMYK cartridges allow you to chop and change colours individually, making it a lot more cost-effective and efficient. However, by using this setup you’re still limiting your colour output. If colour accuracy is crucial to your prints, then you’ll want to start looking at printers with more than the standard 4 ink cartridges like the Pro Photo devices.
Does it Matter Which Paper Type I Use?
The paper you use can have quite a big affect on the results you’ll get when printing your photos. You should look to use glossy paper but there are a couple of different kinds. Some glossy paper will be described as standard or everyday use and these are at the cheaper end of the scale. This still works perfectly well but as you can probably guess, the colour won’t be as strong as it could be as it will lack vibrancy and depth.
If you’re looking for the best quality possible then look for ‘ultra’, ‘premium’ and ‘professional’ glossy papers. These are a heavier gloss meaning they will generally offer better print quality, are a brighter white, produce better colours and are less likely to fade and discolour over time. Still, if you’re just looking for something to hang on the fridge or stick in your wallet rather than fully frame and hang up then the standard glossy papers will be ideal.
So What Does It All Mean…?
In short, it all comes down to your specific needs. If you’re solely looking to print photographs of high-quality, then look at dedicated photo printers with pigment ink and high gloss paper. However, if photo printing isn’t your sole goal and you’ll be printing to a budget or a lower standard is required then look at inkjet machines with dye based ink and standard gloss paper.
Semi-Pro
If you’re an amateur photographer or artist, then you’ll want good quality prints to showcase or sell your work. This makes picking the right printer a key decision as a good quality print will have a much more striking impact than a poor print or a digital version.
You’re probably looking to print in bigger formats so we’d recommend starting off with an A3+ printer. Most modern DSLR cameras will have a high mega pixel sensor and you could find yourself with pictures hitting the colourful heights of 3500 x 5100 pixels. This makes A3+ printers a prime candidate, as there’s little chance of degradation because they’re already a large image.
Alternatively, if you’re digitising physical copies then look at scanners with higher resolutions. Also try to save your scans as TIFFS rather than JPEGs as the TIFF format is the industry standard file format for images. Unlike JPEGs, TIFFs aren’t compressed meaning that all the data from the photo remains intact and results in a much higher quality.
It’s always best to keep a lower quality version of your image as well to optimise things like crop and positioning to give you a better idea of how the image will look on paper.
Print Volume and Inks
This will become vitally important because you’ll come to realise that art and photography printers don’t actually have a huge variation in cartridge size. Not only this, but some only offer a standard size cartridge per colour and will only tell you the amount of ink available in ml rather than a page count. This is frustrating of course as you’ll have to estimate your usage depending on page coverage.
There are various software platforms available for such tasks but we’d actually recommend not using these. Every image you have is going to vary, meaning you’ll use different amounts and different inks for each picture. The paper size and type used also affects the amount of ink you use so we’d advise keeping track of how much ink certain prints use to help you establish how much you’ll need further down the line.
As mentioned, pigment inks offer the better quality and long term results and this is the type of ink you’ll find as you move up the price bracket.
With lower end printers, there is a choice to be made; either opt for long lasting pigment, or bright and vibrant dye. The pigment inks used in machines like the Canon PIXMA Pro 10s and the Epson Surecolor SC-P600 offer vibrant colours and deep blacks, as well as durability and higher detail in monochromatic prints. The same is true higher up the range too.
Paper Type
As mentioned, we’d advise using a glossy paper if you’re a casual or home user. However, as a semi-pro, you may want to be a bit pickier on the paper you use depending on the type of effect you want your photo to have.
Generally speaking, there are four kinds of paper you could opt for –
Matte – This has no shine and arguably is the best look for art prints. There are some variations of matte paper including the Canon Matte Photo Paper (MP-101), which is a bright, smooth paper. Alternatively, you could opt for the Epson Cold Natural Press, which is a velvety matte with a ‘vintage analogue’ feel. Many professional photographers use this who are looking for high-quality matte prints. But you can still pick up some high-quality matte media at a low cost such as this Xativa option.
Satin – Satin sits between matte and gloss and has a smooth ‘semi-gloss’ finish. This allows for the same colours and tones of gloss but with less shine. The Canon Plus Semi-gloss (SG-201) would be a great choice for semi-gloss paper, as would our Xativa Satin-Pearl range.
Lustre – Lustre, also referred to as pearl, is similar to satin in that it doesn’t have a full blown glossy effect. However, it has a delicate texture that’s reminiscent of old lab prints. The texture reduces the amount of light reflected from the paper and it’s more resistant to things like finger prints. Canon’s Pro Lustre (LU-101) is very durable and fast drying, making for a high-quality photo paper, suitable for both day-to-day use and professional printing, while the Xativa Satin-Pearl range would also work for this.
Gloss – Gloss is probably the most common photo paper on the market. The coating makes small details bounce off the page, and you get vivid colours and extremely deep blacks. High gloss papers are typically better suited for action or promotional images, as the vivid colours and high D-Max (deep black finishes) accentuate details and make certain elements of an image “pop”. There are varying degrees of gloss available, although it is possible to go “too glossy”. Too high of a shine will make the image difficult to view from certain angles. Epson’s Premium Glossy Photo paper is a great example of a good quality day-to-day gloss paper, while Canon High Gloss media and Xativa Gloss both offer a high quality economic alternative.
A couple of final things to consider when picking your paper is the GSM (grams per meters squared or weight) and texture. The weight of the paper won’t necessarily give a better print but a heavier paper will give it a more substantial feel. Texture can also be tough and you need to find a perfect middle ground. No texture will make the image feel lifeless and hollow, while too much will take focus away from the image itself.
Professionals
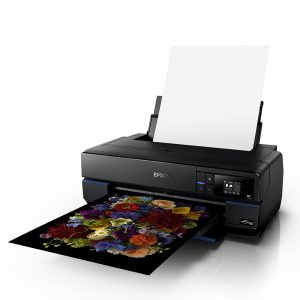
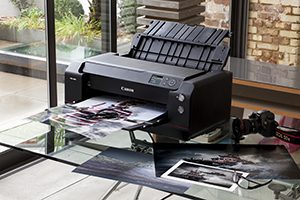
As a professional photographer you want nothing but the very best from your prints. We get that. There are several great options but we recommend three printers for your perfect setup. The Epson SC-P600 & SC-P800 and the Canon Pro 1000 will fulfil every need you have to achieve a technically perfect print. Offering unprecedented print quality on a huge range of media, using some of the best inks on the market. When it comes to art and photos, there’s nothing better. Head straight over to our professional photo printer section if you’re looking to pick up one of these straight away
You’ll likely be wanting to print on a huge variety of media in different sizes so it’s of paramount importance to get a printer with good paper handling. This will allow you to print small proofs and glossy photos to large panoramas and portraits.
You’ll need to combine this with a printer that can deliver exceptional print quality to ensure that you can get the most of that 16-bit TIFF file.
Another thing to consider that can often be overlooked is ensuring you have a calibrated screen. If your screen isn’t calibrated, then the end result will be prints that look nothing like the edit on your screen. Correct calibration will ensure near identical perfection from your screen to your prints. This will also drastically save you on cost as you won’t need to print a load of versions of your photo due to incorrect prints.
Print Volume and Inks
If you’re printing on a regular basis, then high-yield consumables are a must. The Epson SC-P600 offers a good amount of ink and will be large enough for most photographers. However, if you’re extremely busy then we’d recommend the SC-P800, which allows for potentially three times as many image prints than the SC-P600 in-between each cartridge replacement. This will also help for the large images as this printer can print borderless up to A2.
Both of these recommended printers use a nine-ink system featuring Epson’s UltraChrome HD inks, which helps to deliver highly accurate colours in stunning levels of detail. As well as two types of cyan and magenta and a yellow cartridge, these come with 4 types of black. This has a significant affect on the detail delivered as matte black, photo black, light black and light light black ensure that shadows stay dark but extremely detailed.
These inks also reduce glossiness, which reduces bronzing; a problem you may encounter with other ink. Bronzing can cause part of an image to disappear at certain angles or take on a uniform tone. This isn’t always an issue and can barely be seen at some angles but if the effect is noticeable, it’s a pretty unattractive feature that you’ll want to avoid.
Paper Type
With such high levels of details and quality, your best bet is to go for an Epson paper type as well. They have a huge range of media to choose from for professional prints. Their “signature worthy” papers are some of the best examples of fine art media on the market, and when used in conjunction with the SC-P600 or SC-P800, you’ll be getting some of the best prints possible. As a professional photographer, brand loyalty really shouldn’t be taken for granted and can ensure some of the best results you’d hope to achieve.
Machines at this level tend to have paper profiles written into the machine allowing you to produce the best prints possible. So if you use one of these Epson or Canon printers and use media of the same brand, you’ll be able to maximise your print quality by having the printer detect the media and calibrate itself to produce the best results for the media being used. Some third party media manufacturers allow you to download the paper profiles straight to your printer to help you get the best quality like hahnemuhle.
Cold Press Paper – Both Epson’s Cold Press Natural and Cold Press Bright papers are Acid free, PH buffered and 100% cotton. They also weigh in at 340gsm per sheet, and as discussed earlier, this means you’ll really be able to feel what you’re holding. Both have a soft texture complimenting detailed prints and both also dry instantly so you can handle your prints as soon as they’re out of the printer. The velvety matte finish has a very attractive quality, and this mixed with the subtle yet visible texture and the weight makes for a fantastic feeling paper.
The main difference between these two paper types is the colour. The bright uses brighteners that react to UV light and makes the whites whiter. If you have no need for the extra brighteners, then we’d just advise using the natural instead. These papers have a wide colour gamut and a very high D-Max, so printing vibrant and accurate colour prints, as well as deep and detailed black and white images is going to be made very simple.
Hot Press Paper – These papers are pretty similar to the cold press versions and contain many of the same qualities. The hot press paper is slightly lighter in weight and has a super-smooth feel so there’s no texture to distract the viewer if you’re printing more real life photos. Everything else largely remains the same including the brightener options.
Of course, there are many other paper options for you to choose from and all can have different yet key effects on the outcome of your print.
Ultimately, it’s your choice but if you can find the perfect combination between your printer, inks and paper then you’ll find yourself with some truly stunning photographs.


